Set up the Automated Communications feature
Before you can get started, you'll need to follow the steps in our Automated Communications Setup guide. You'll:
- Create a Remote Site (so you can use the template editor)
- Enable the feature (so you can start using it!)
Create automatic pre- and post-show email templates
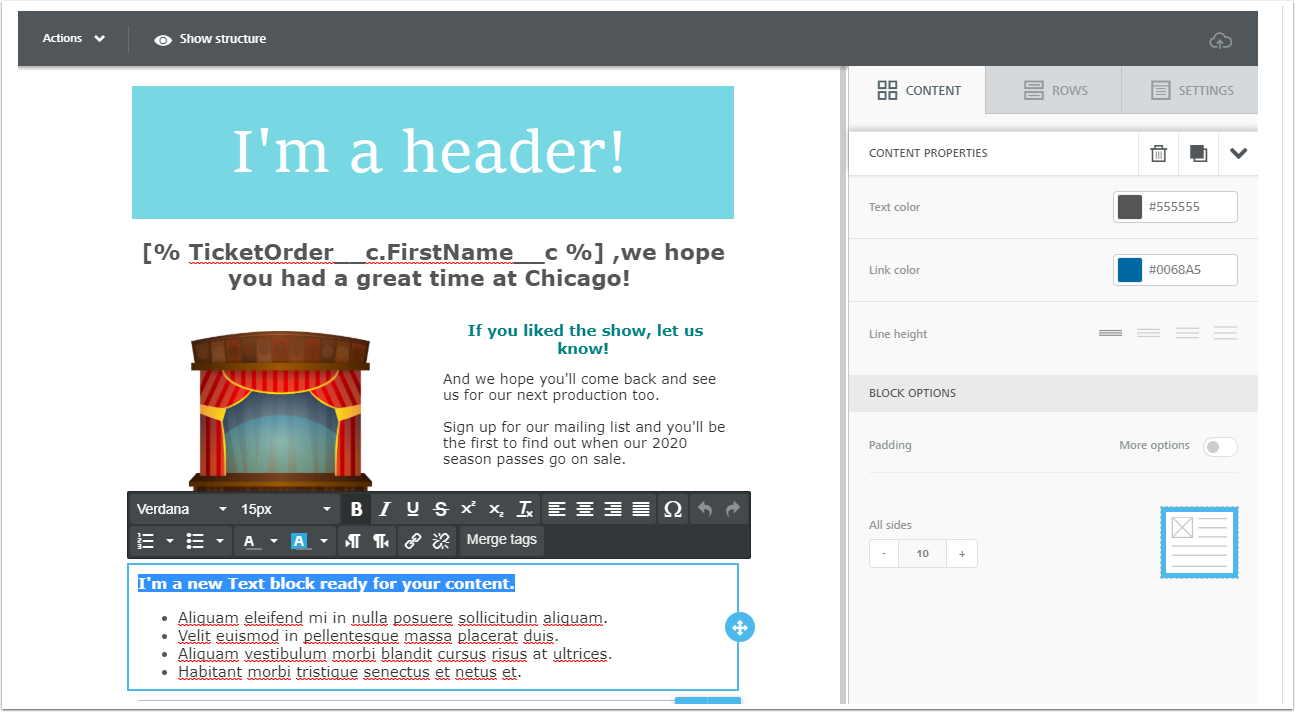
First things first: we need to create templates PatronManager can use to send automatic emails. You'll be able to pull in merge fields, so your templates can have a lot of flexibility!
Before you move on, be sure to create these templates:
- Default pre-show template: we recommend you provide crucial information in your standard pre-show email, such as:
- Ticketable Event Name and Event Instance Name
- When doors open / are sealed, plus intermission details
- Venue location and parking instructions
- Default post-show template: we find most organizations want to provide some combination of the following in a standard follow-up email after every show:
- "Thank you" message
- Link to your website, ticketing website, donation form, and sign-up form
- Subscription information for next season (if available)
- Membership information
- Custom pre- or post-show templates for specific Ticketable Events: these templates override your defaults if you choose to set them. These aren't required, but create them to get the word out about things like:
- Production photos or a show-specific logo
- Unique directions / parking information / rules for an out-of-the-ordinary Event
- An exciting guest performer/artist
- A special reception or Q&A session
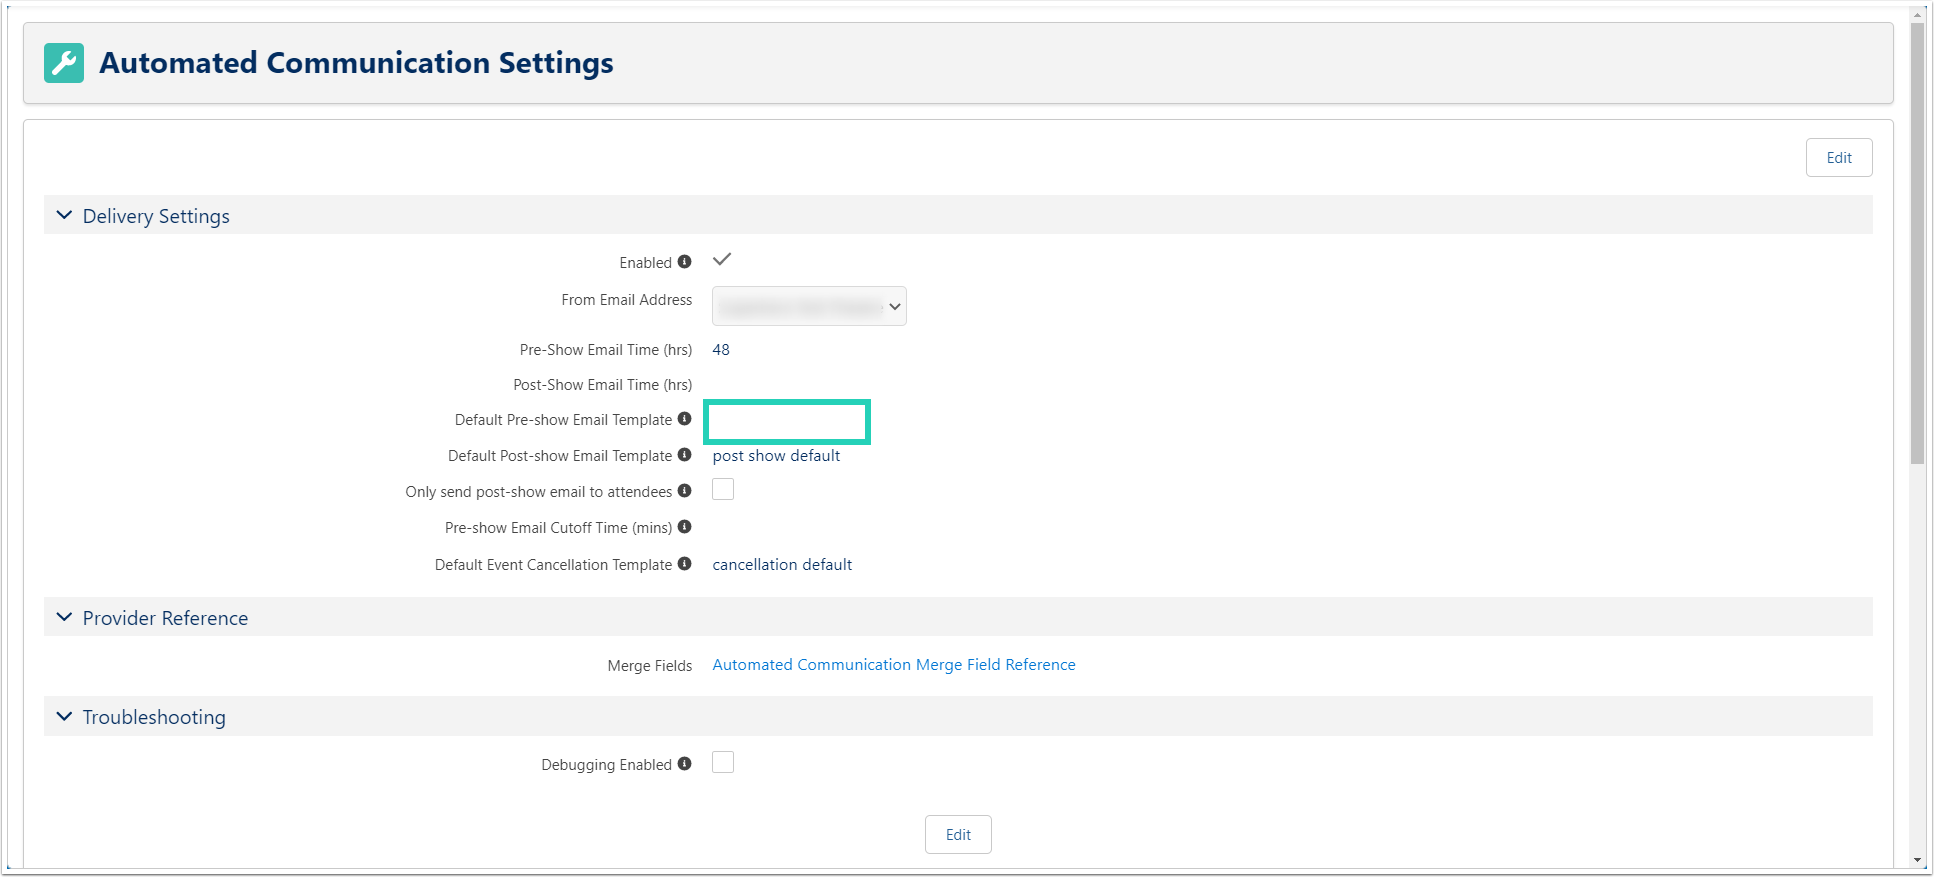
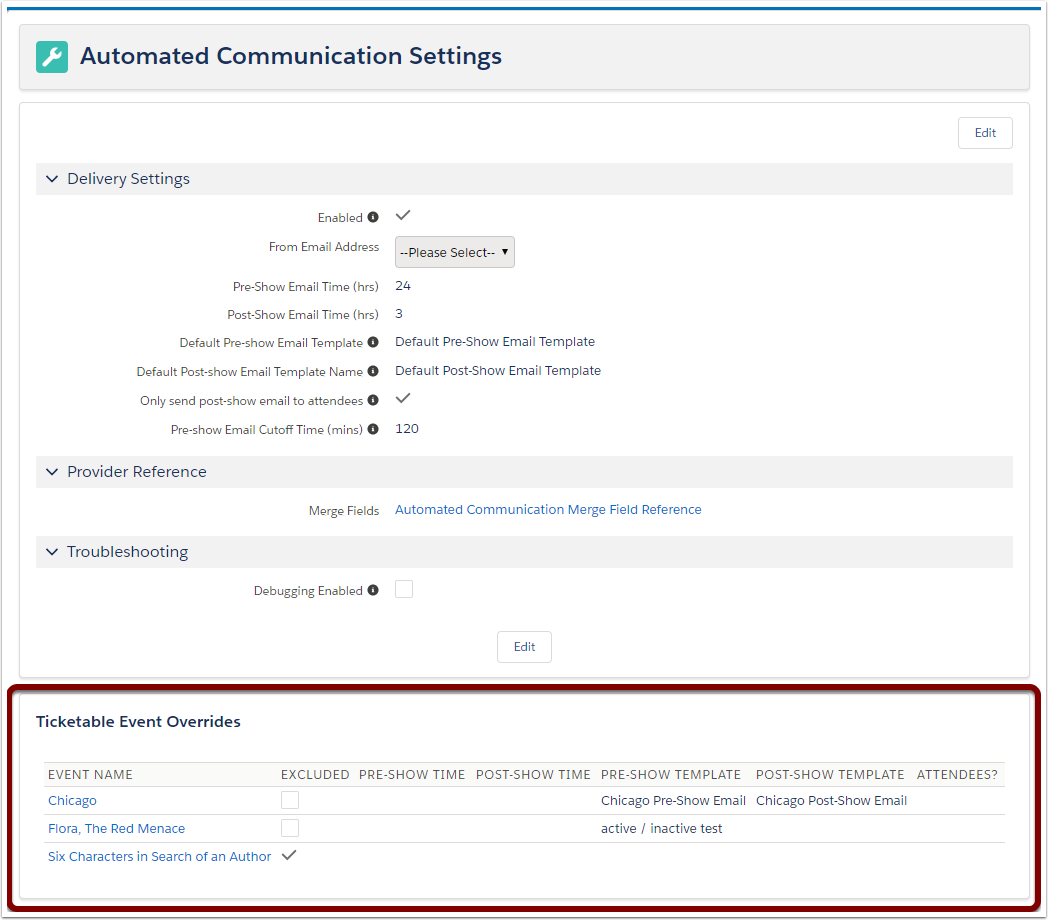
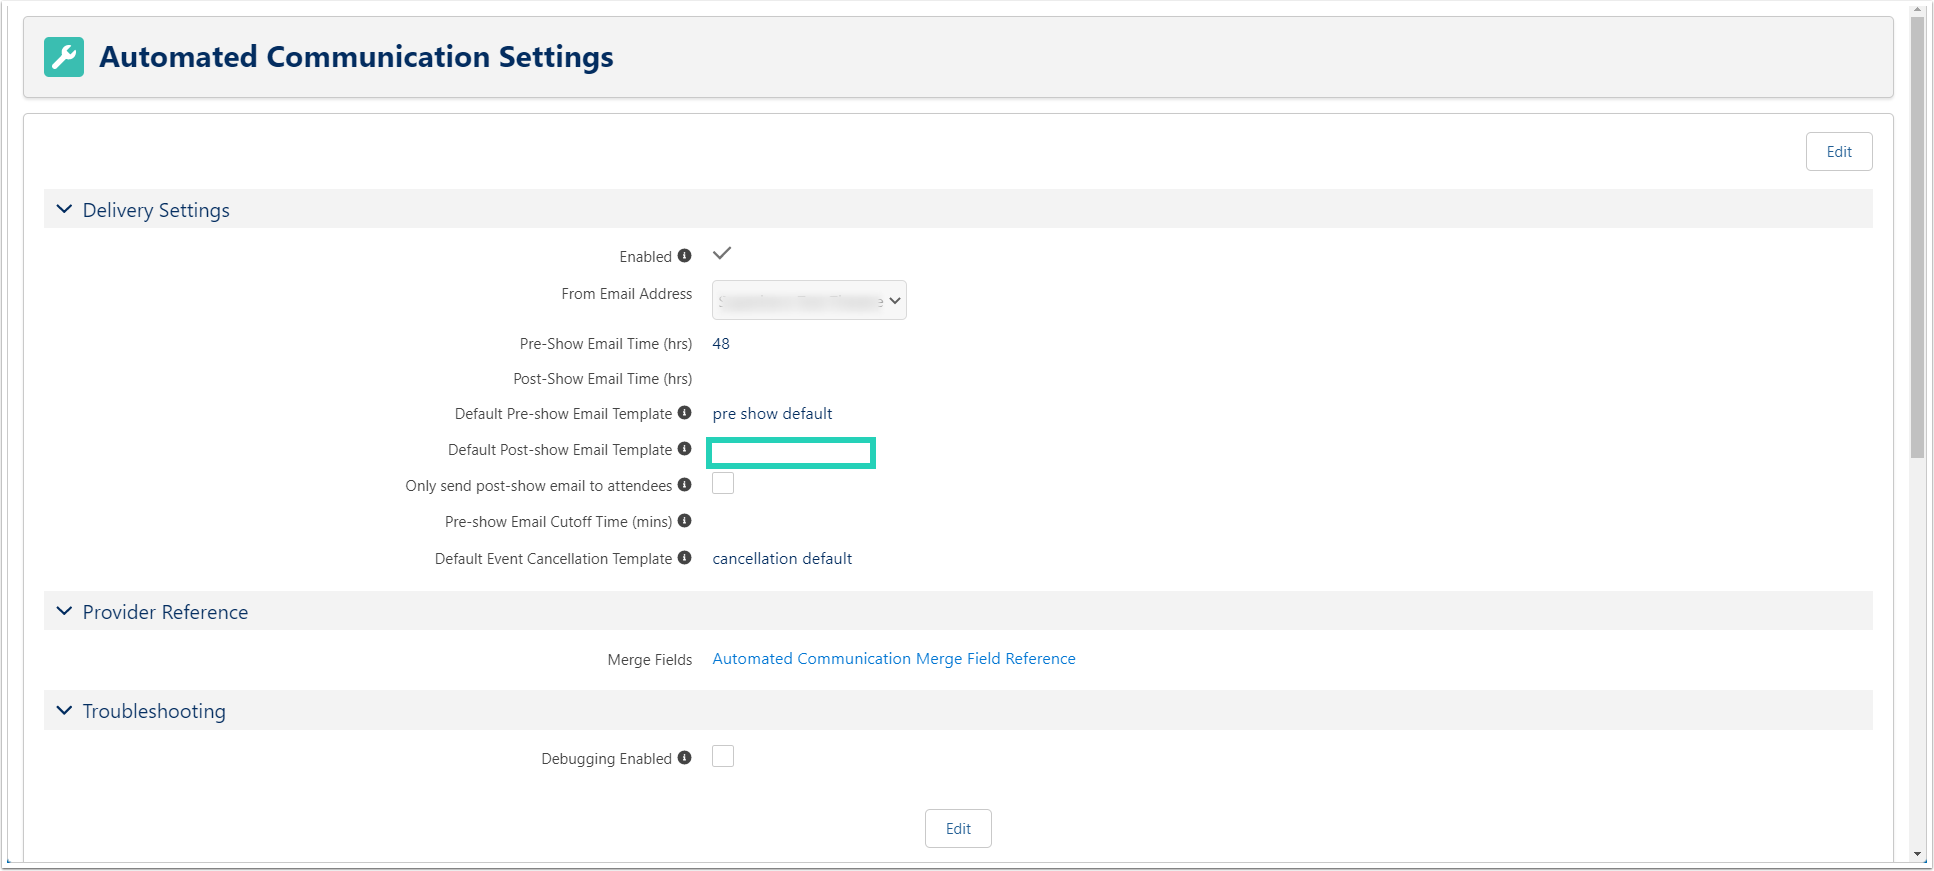
Configure Automated Communications Settings
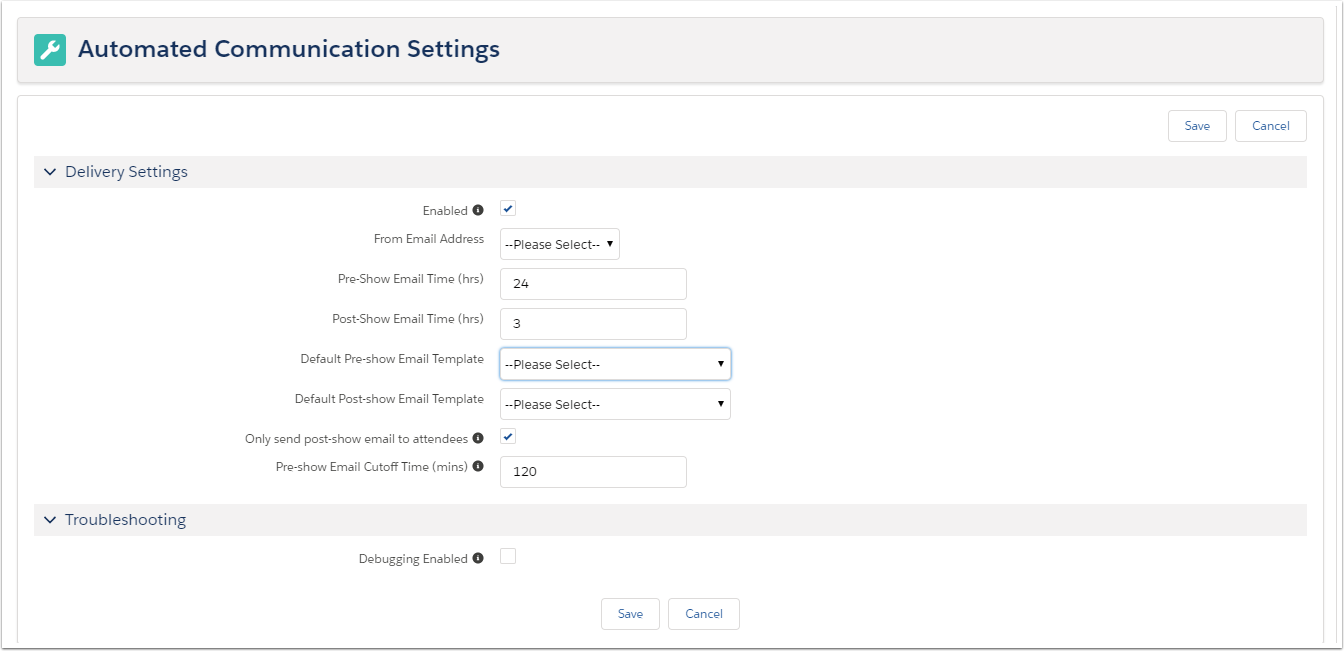
Now we need to tell the system which templates to use as defaults, who these automatic emails are "coming from", and more. We'll do all that in Automated Communications Settings.
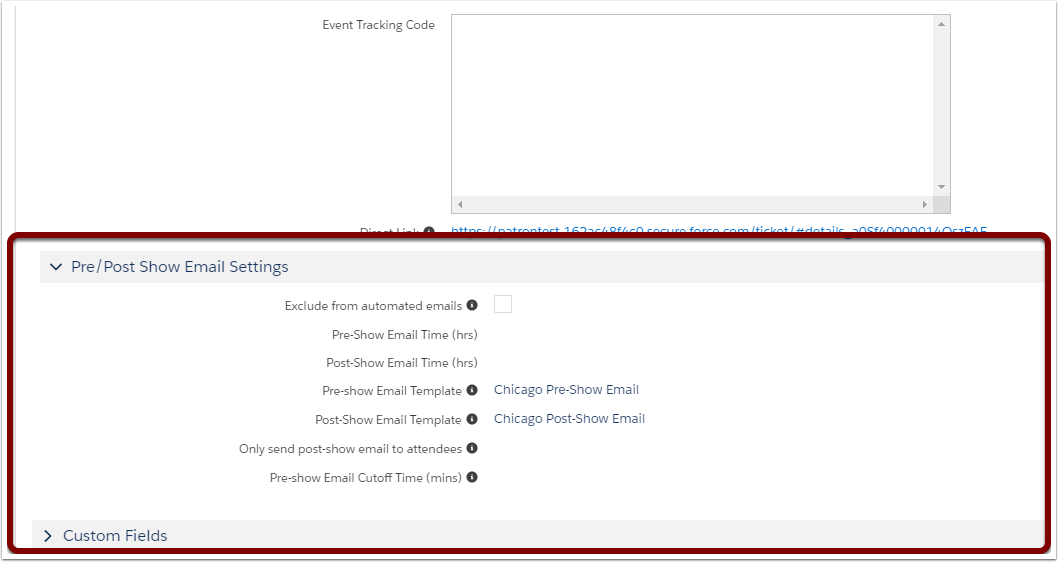
Apply custom templates and settings to specific Ticketable Events
If you've got Ticketable Events that need to behave differently than the rest, now's the time to configure those settings. Here, we can change:
- How far before/after a show the automatic emails are sent
- The templates this Ticketable Event will use, using the custom templates you created at the start of this article
- If the post-show email template will send to everyone, or only attendees
- When the pre-show email stops sending
Get the word out
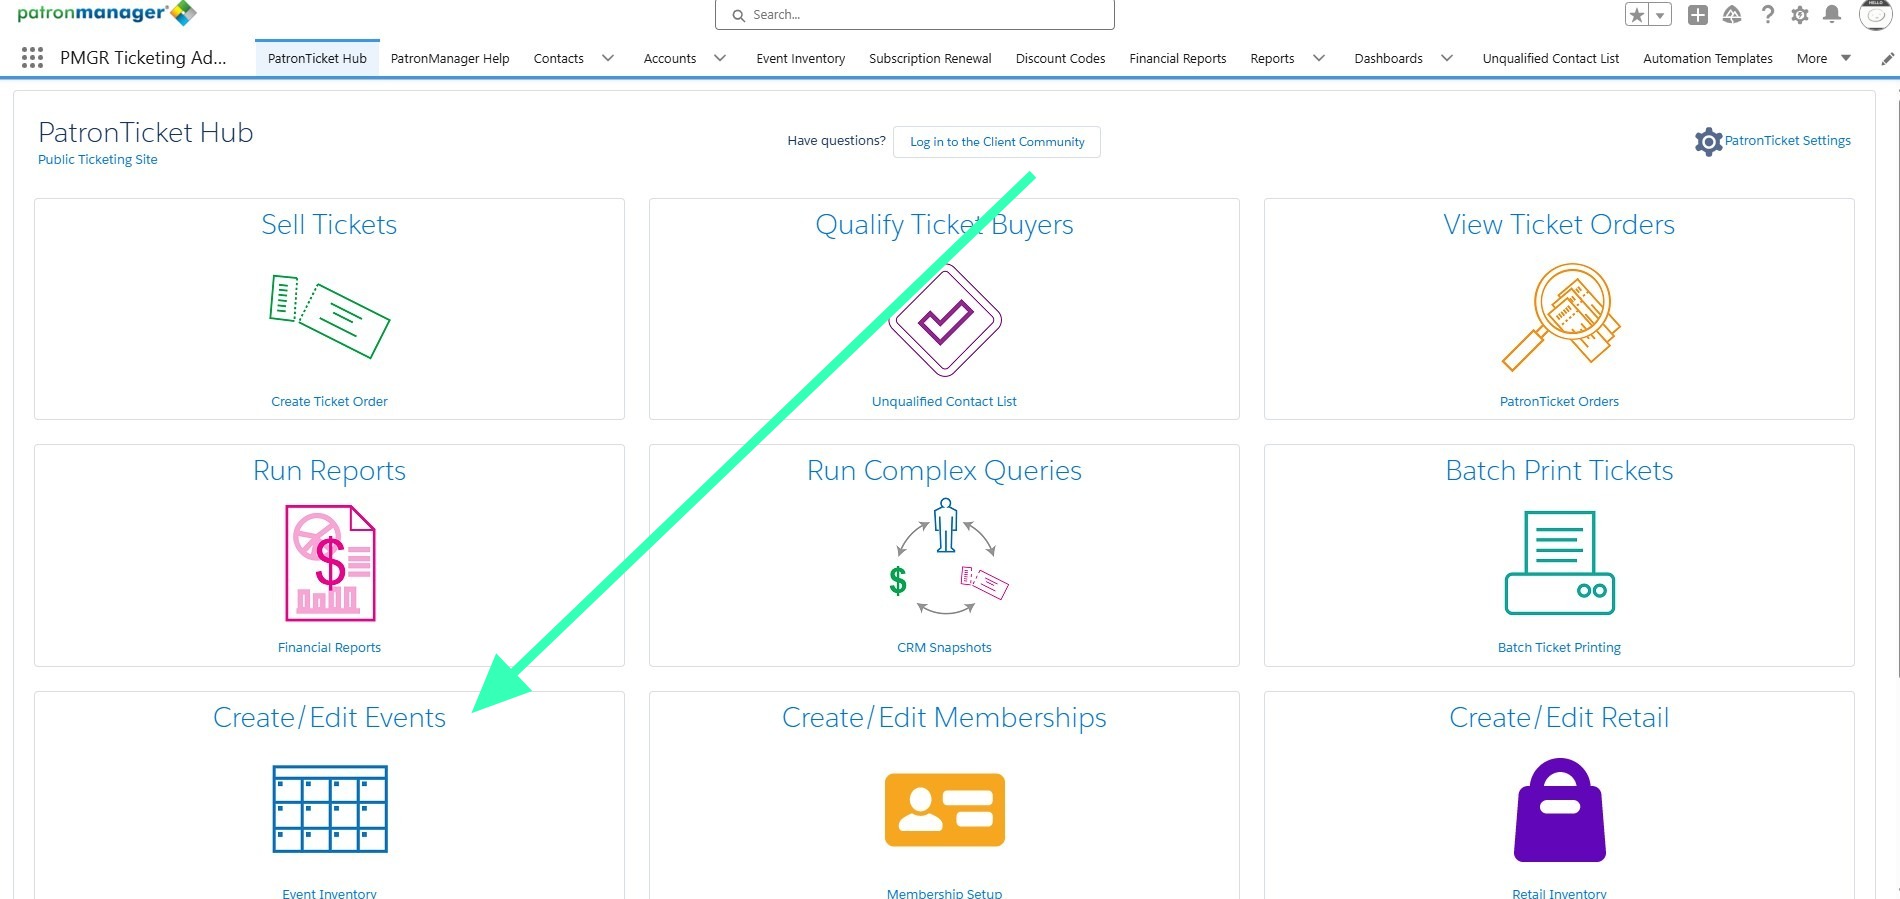
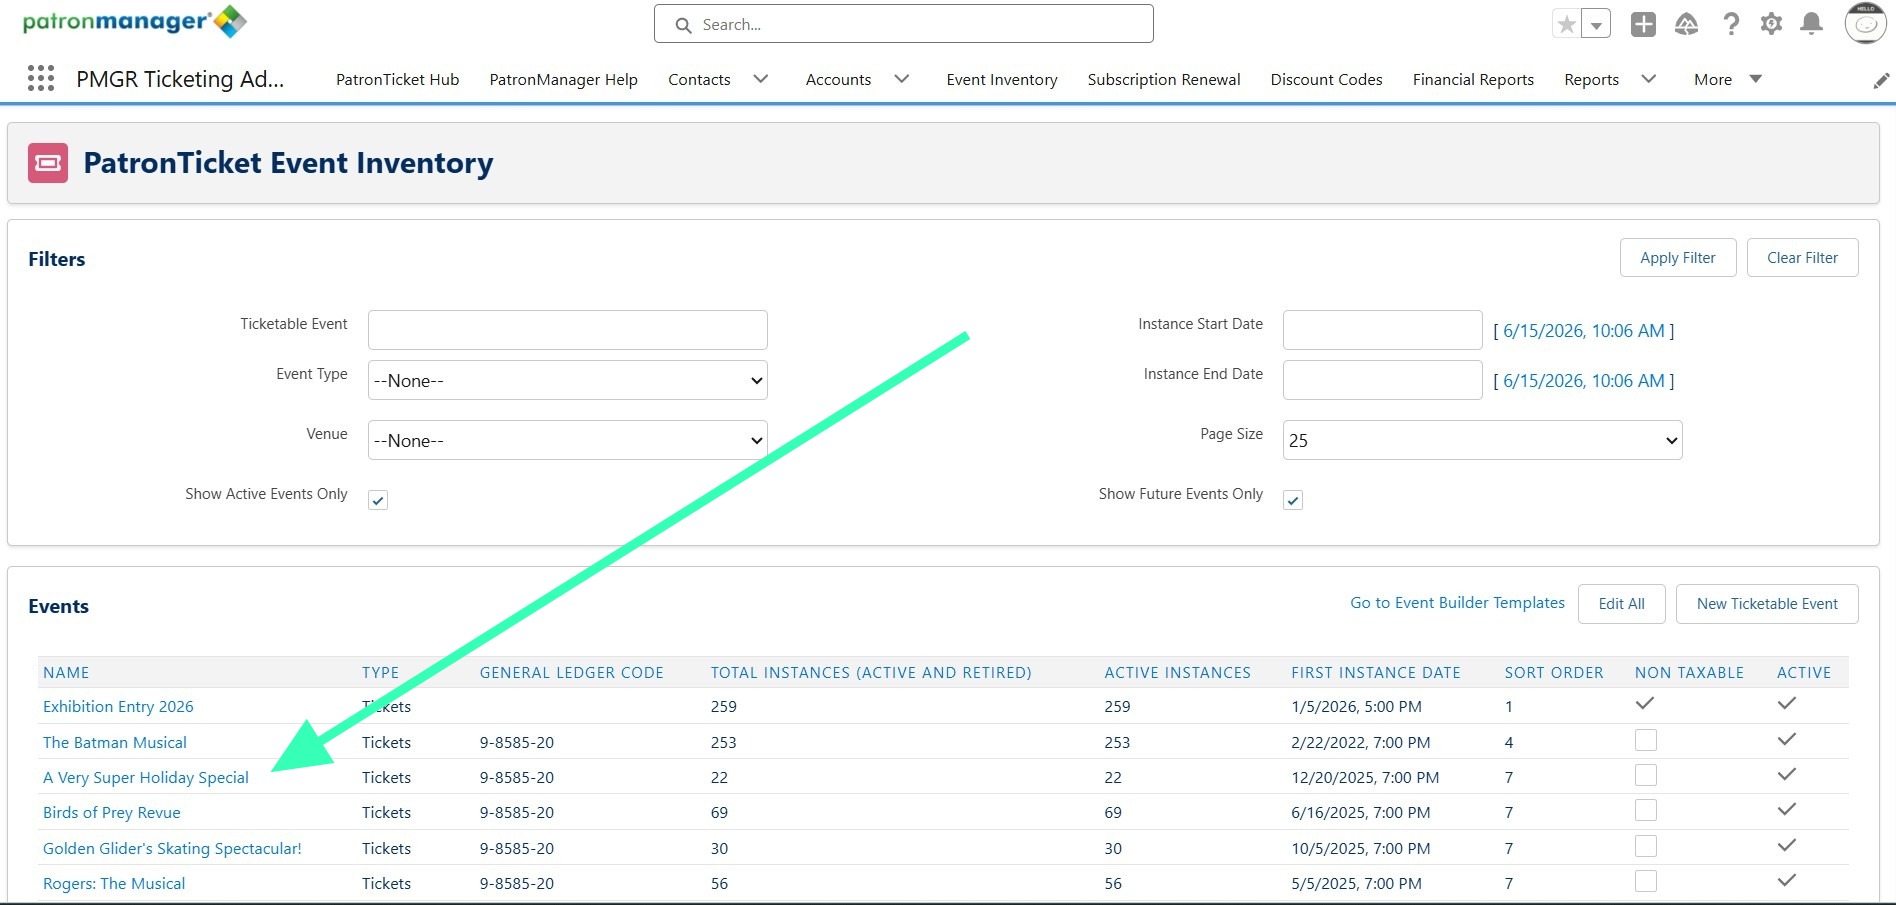
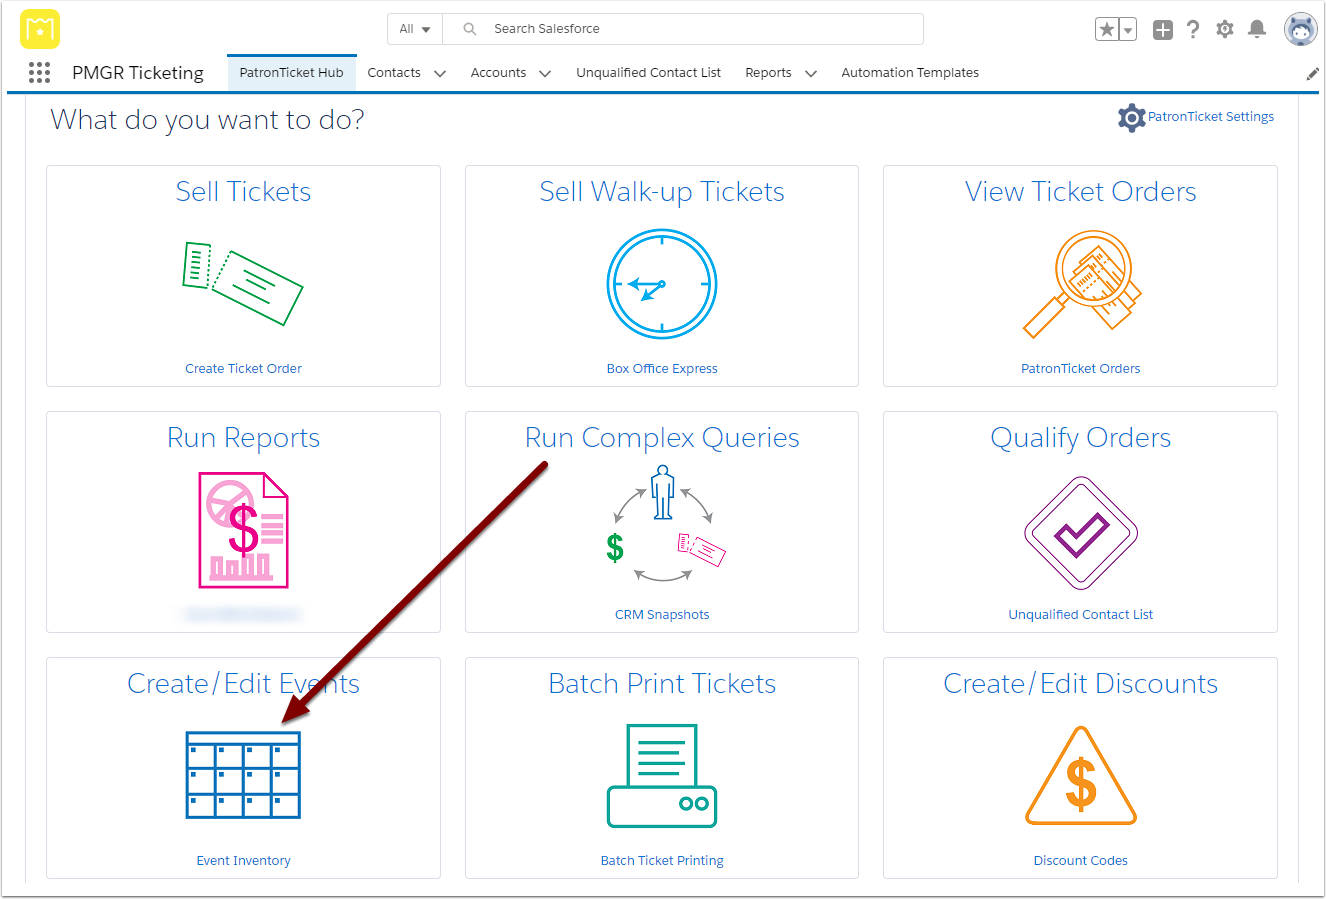
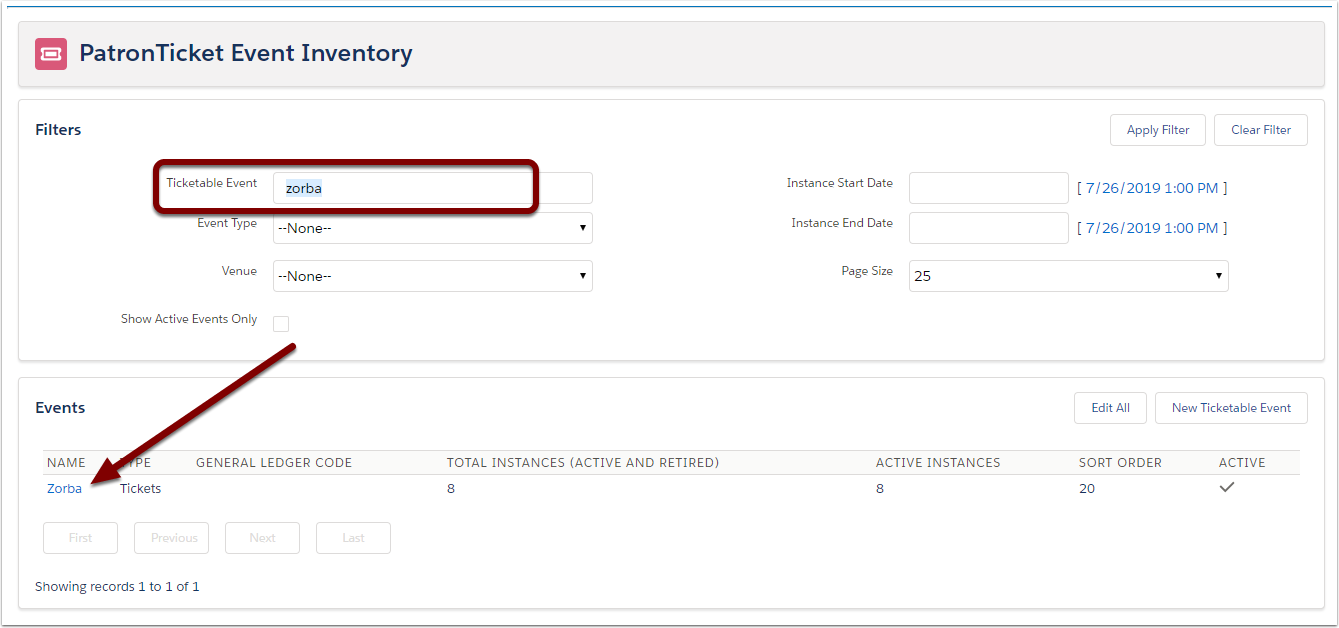
Go to your Event Inventory via the PatronTicket Hub
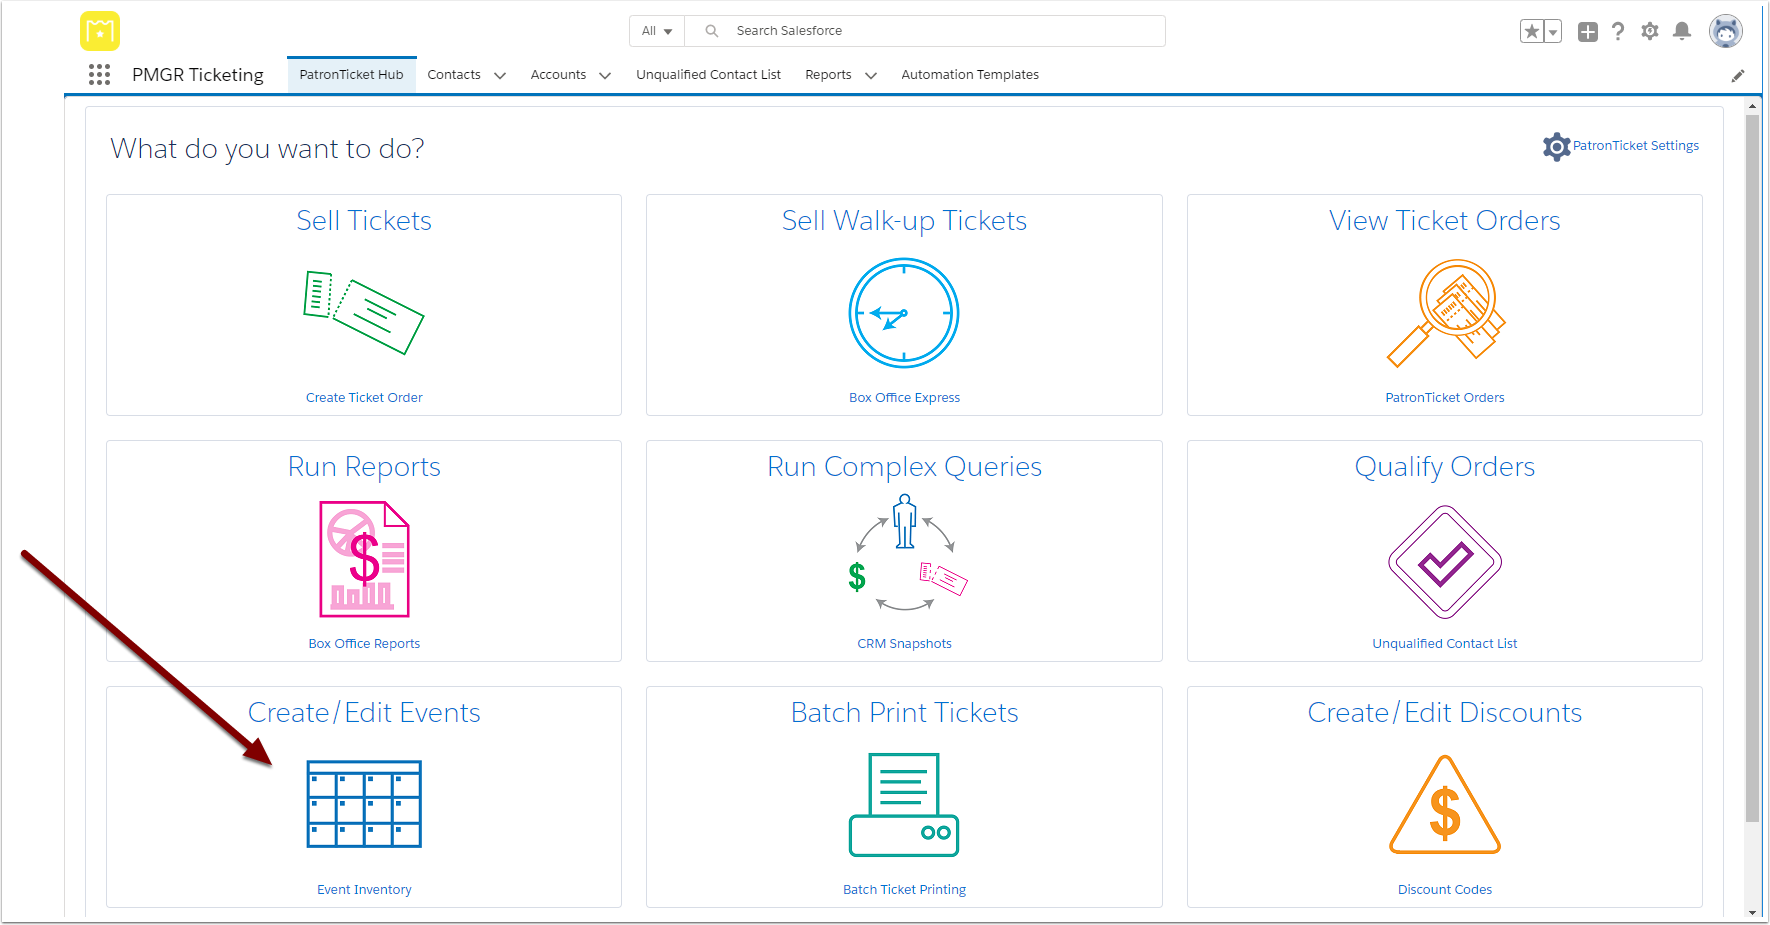
Find and click on the Ticketable Event you've got a custom template for
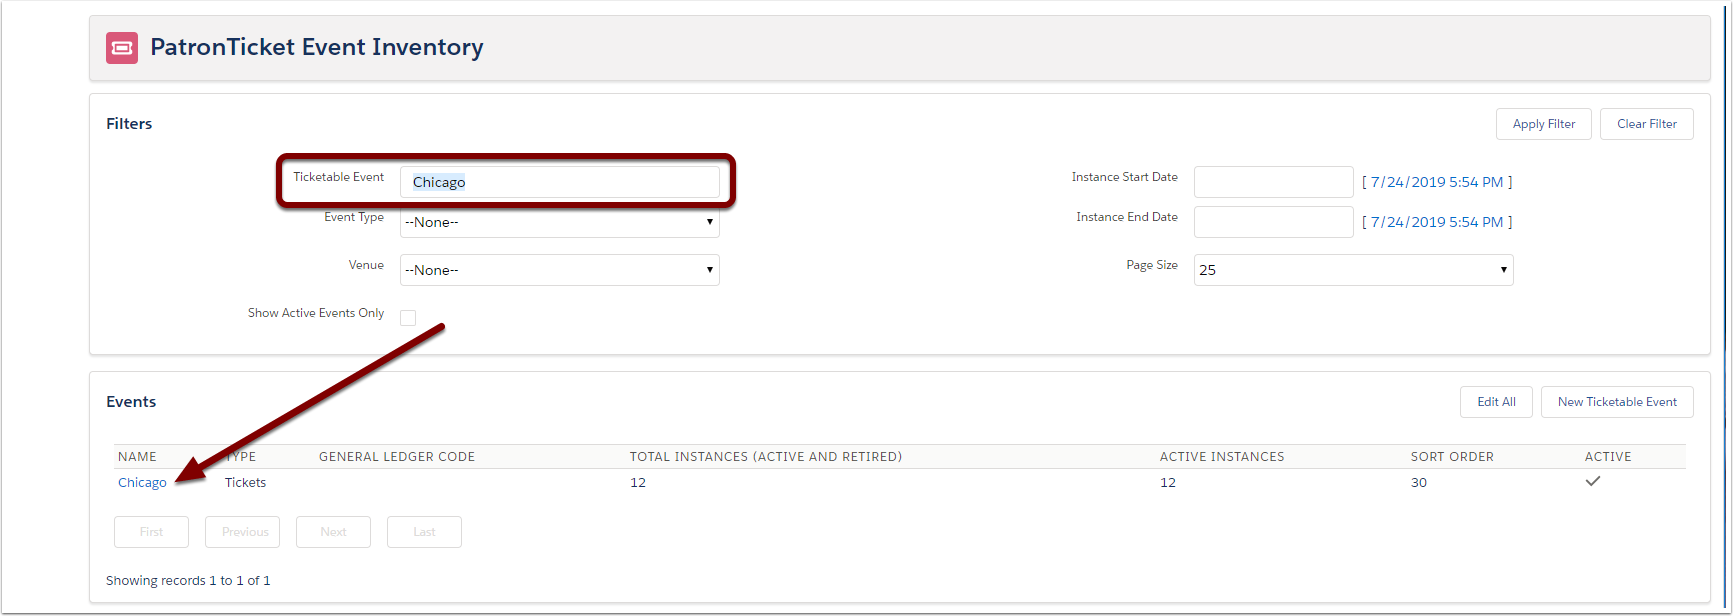
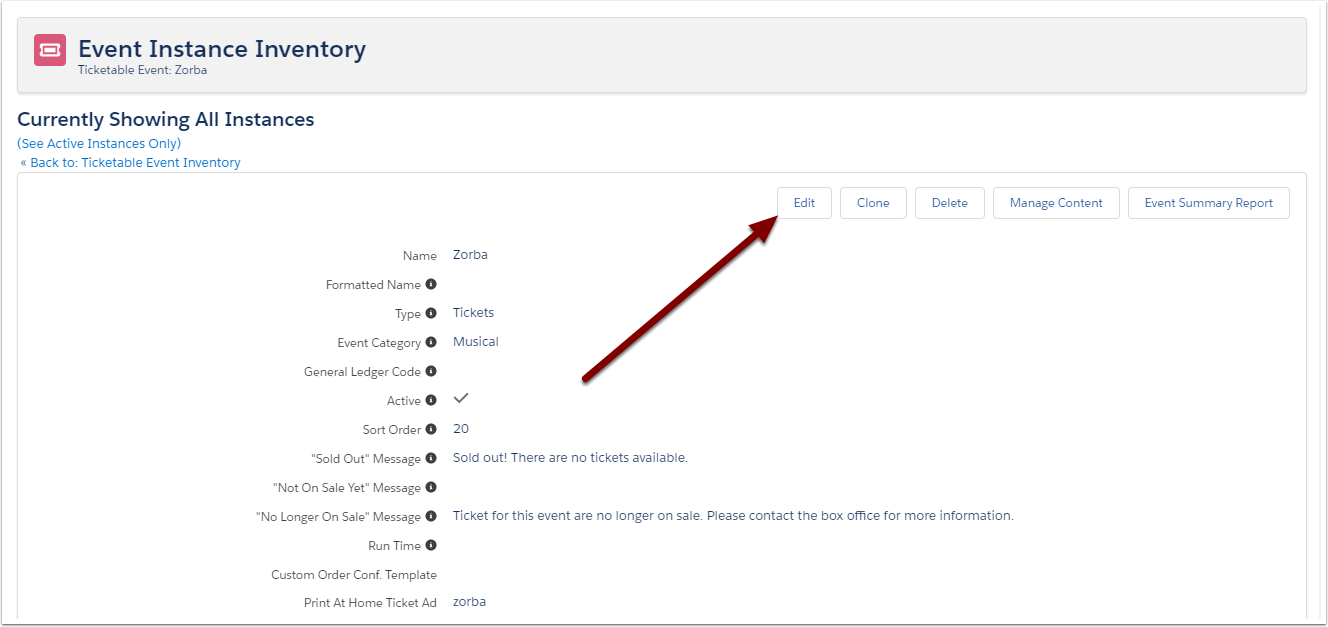
Click Edit
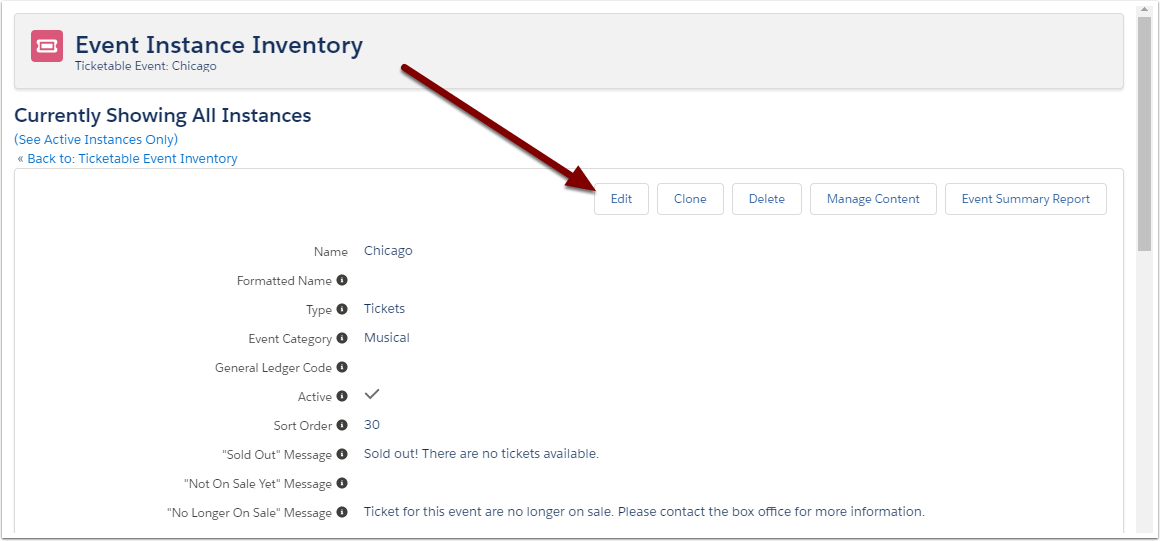
Update the pre- and post-show template fields
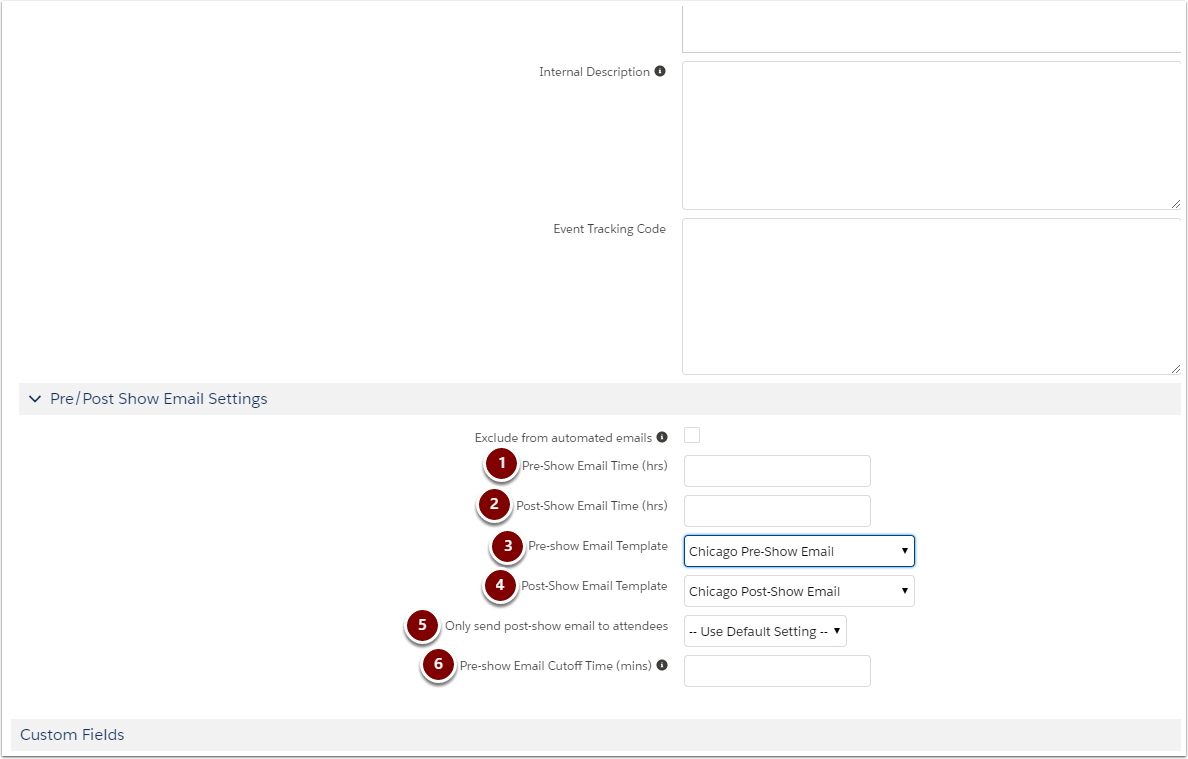
- Pre-Show Email Time (hrs): if left blank, the pre-show emails for this Ticketable Event will follow your default settings
- Note: Automated Communications send every 5 minutes.
- Post-Show Email Time (hrs): if left blank, the pre-show emails for this Ticketable Event will follow your default settings
- Pre-Show Email Template: set to a custom template, or leave as your default template
- Pre-Show Email Template: set to a custom template, or leave as your default template
- Only send post-show email to attendees: if you're checking people in or scanning their tickets at the door, you can exclude patrons who don't show up from getting your post-show email; use the default setting or change it here
- If you don't check people in or scan their tickets at the door, skip this step; otherwise, your post-show email won't send at all
- Pre-show Email Cutoff Time (mins): if left blank, the pre-show emails for this Ticketable Event will follow your default settings
Click Save
Apply custom templates and settings to specific Event Instances
If you have specific Event Instances (i.e., one level more specific than Ticketable Events!) that need to behave differently than the rest, now's the time to configure those settings. Here, we can change:
- If this Event Instance should be excluded from Pre- and Post-Show Emails
- The Pre-Show Email Template this Event Instance will use, using the custom templates you created at the start of this article
Let's get granular!
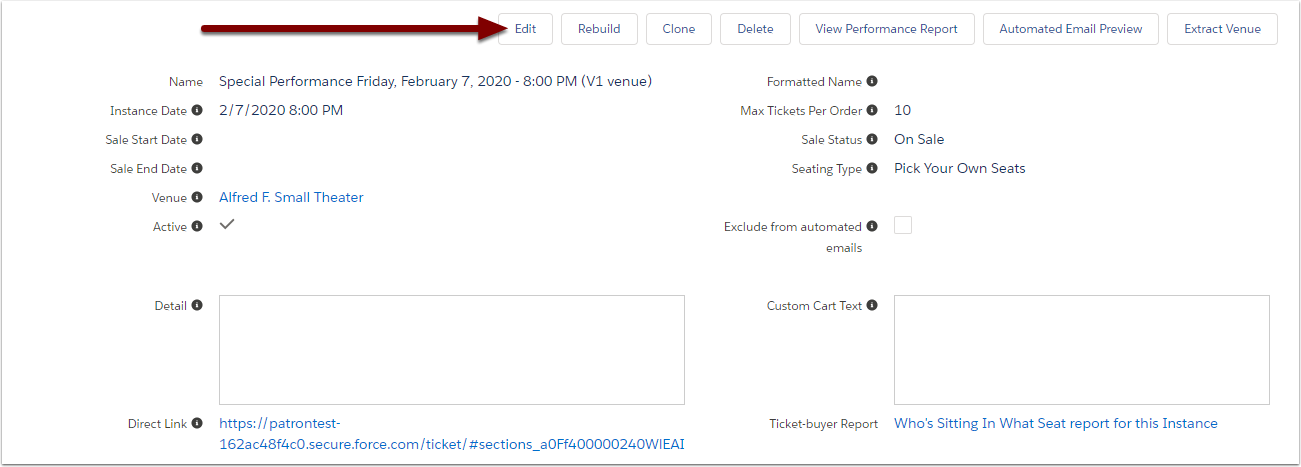
Go to your Event Inventory via the PatronTicket Hub
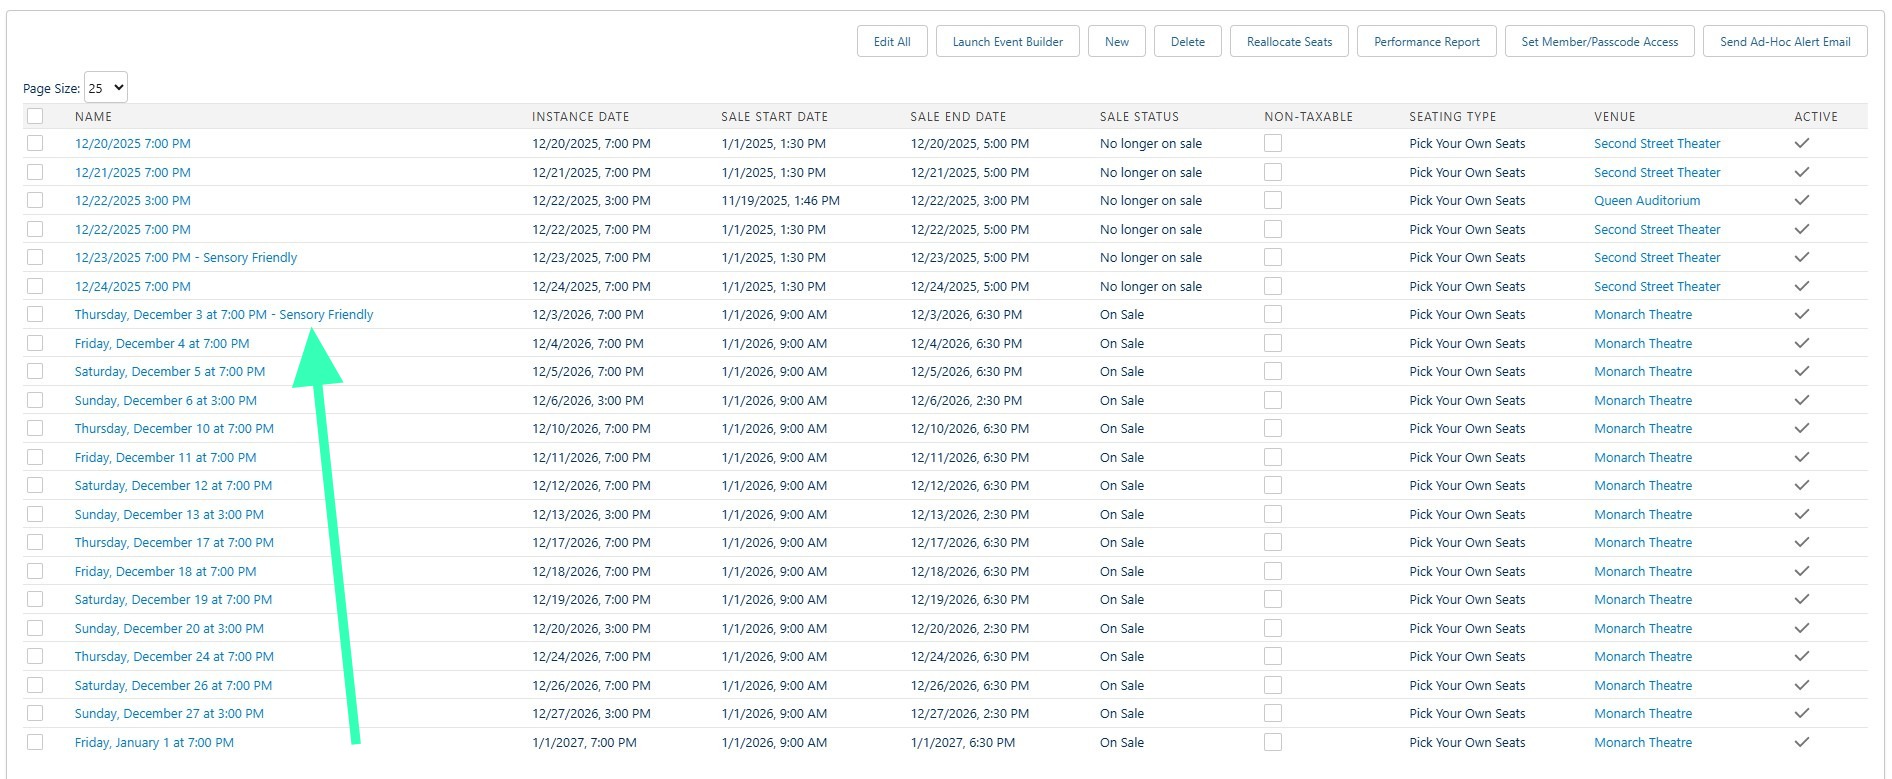
Find and click on the Ticketable Event containing your Event Instance
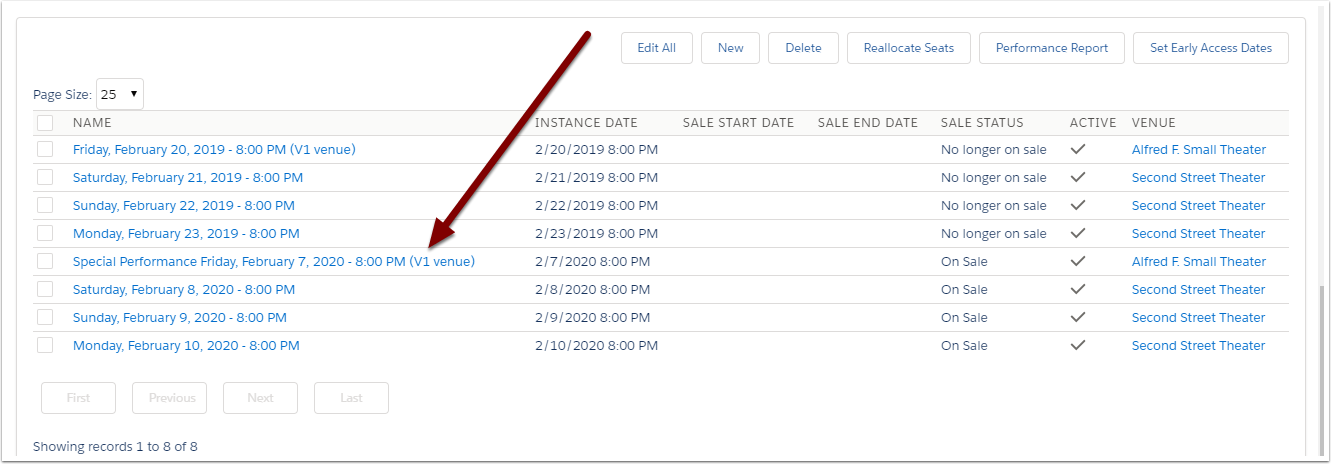
Scroll to the bottom of the page to find and click on the Event Instance you've got a custom template for
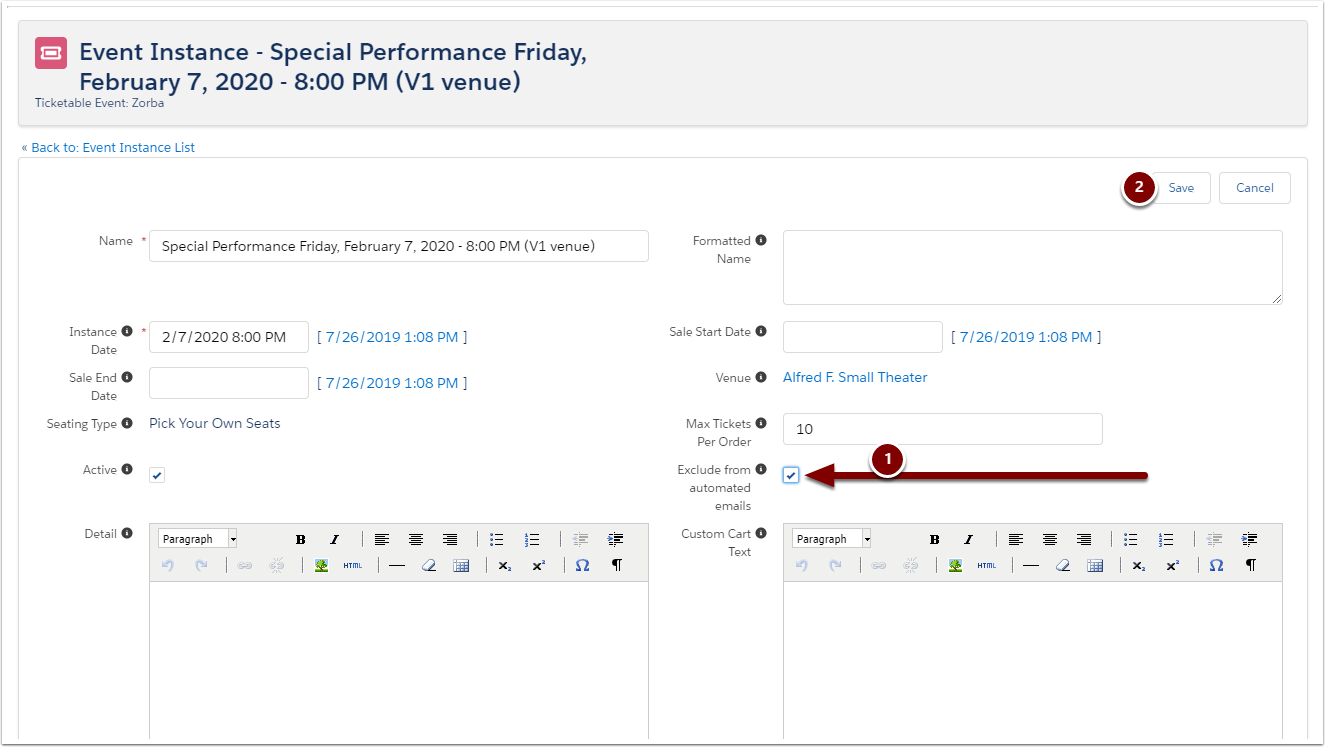
Click Edit
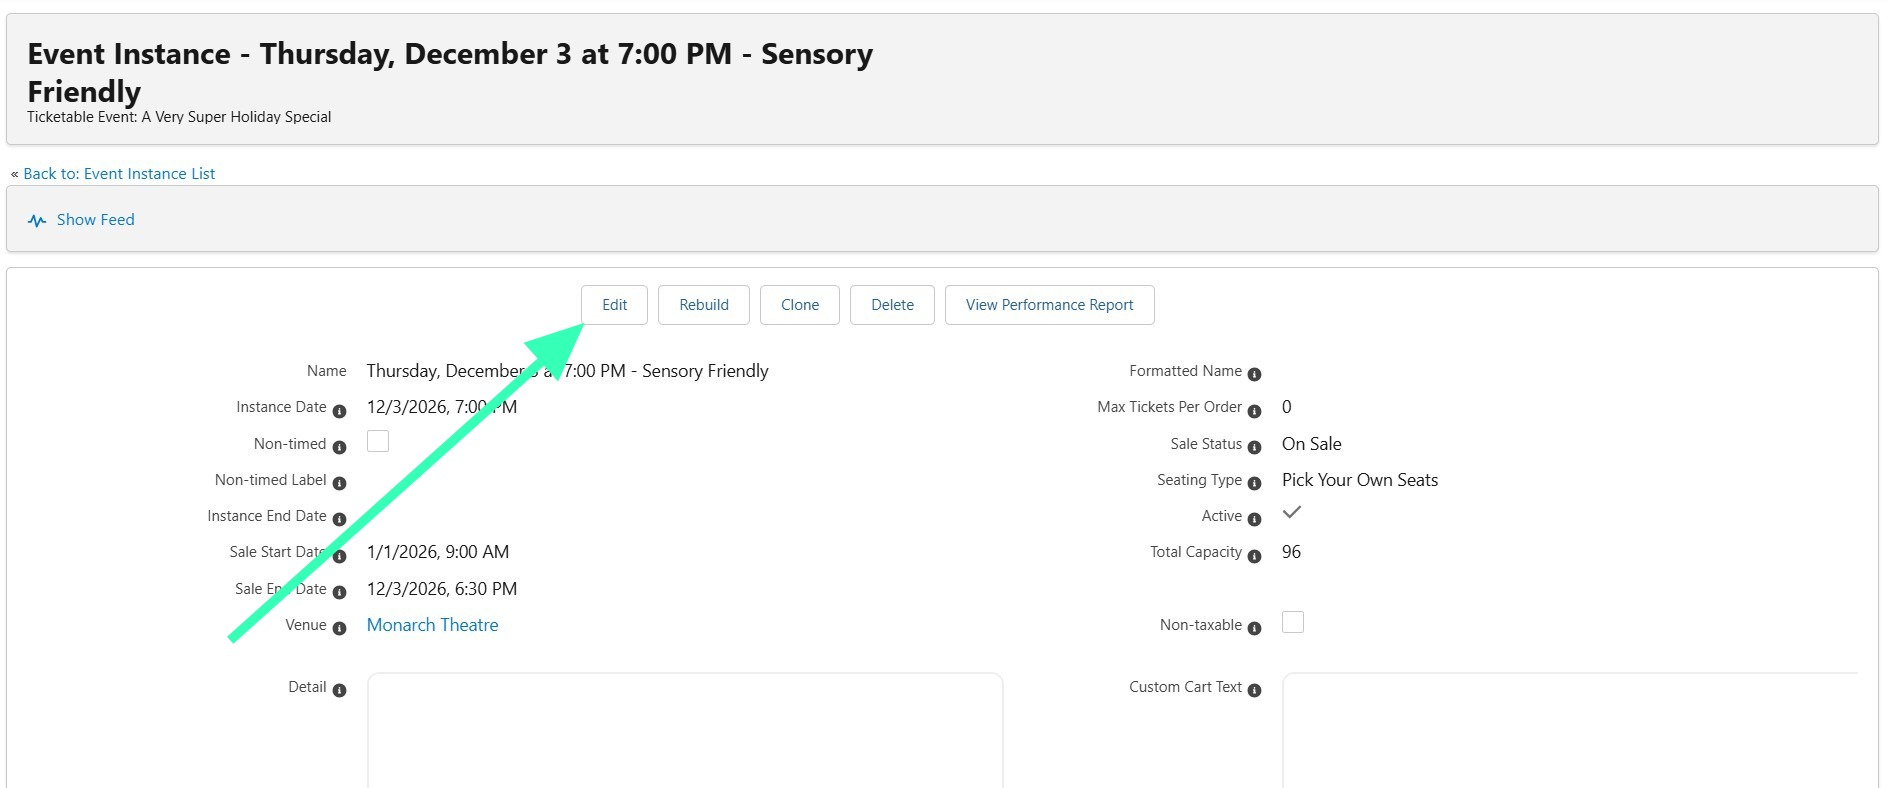
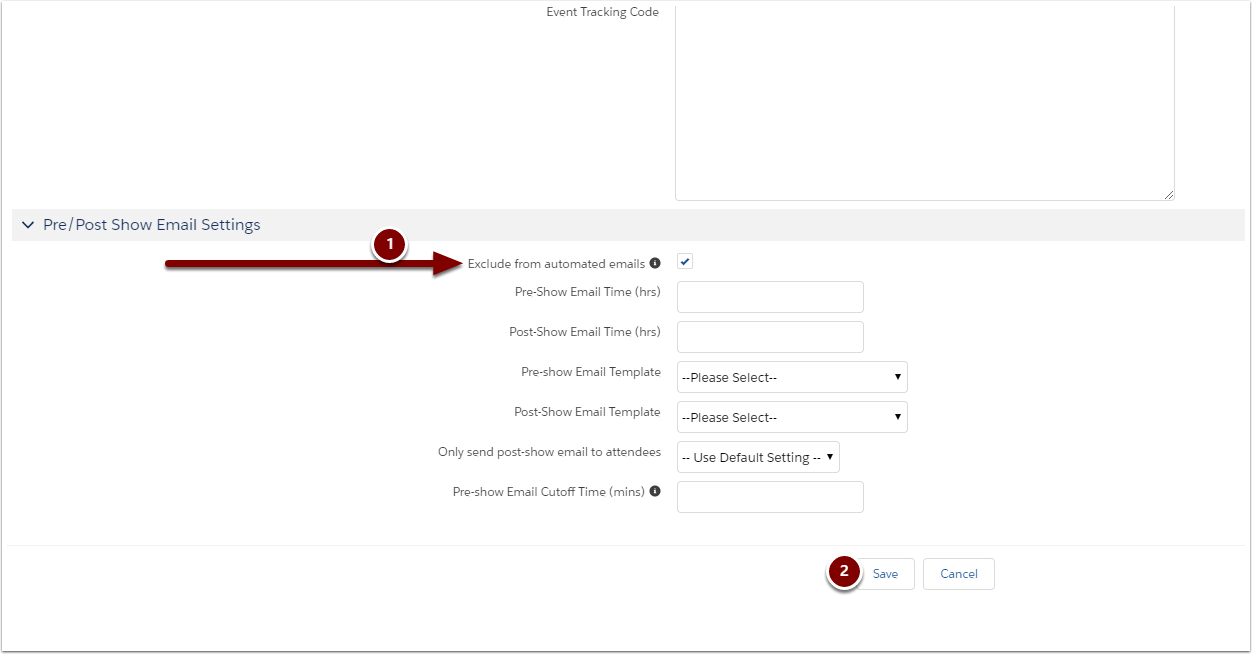
Set your Pre/Post Show Email Settings
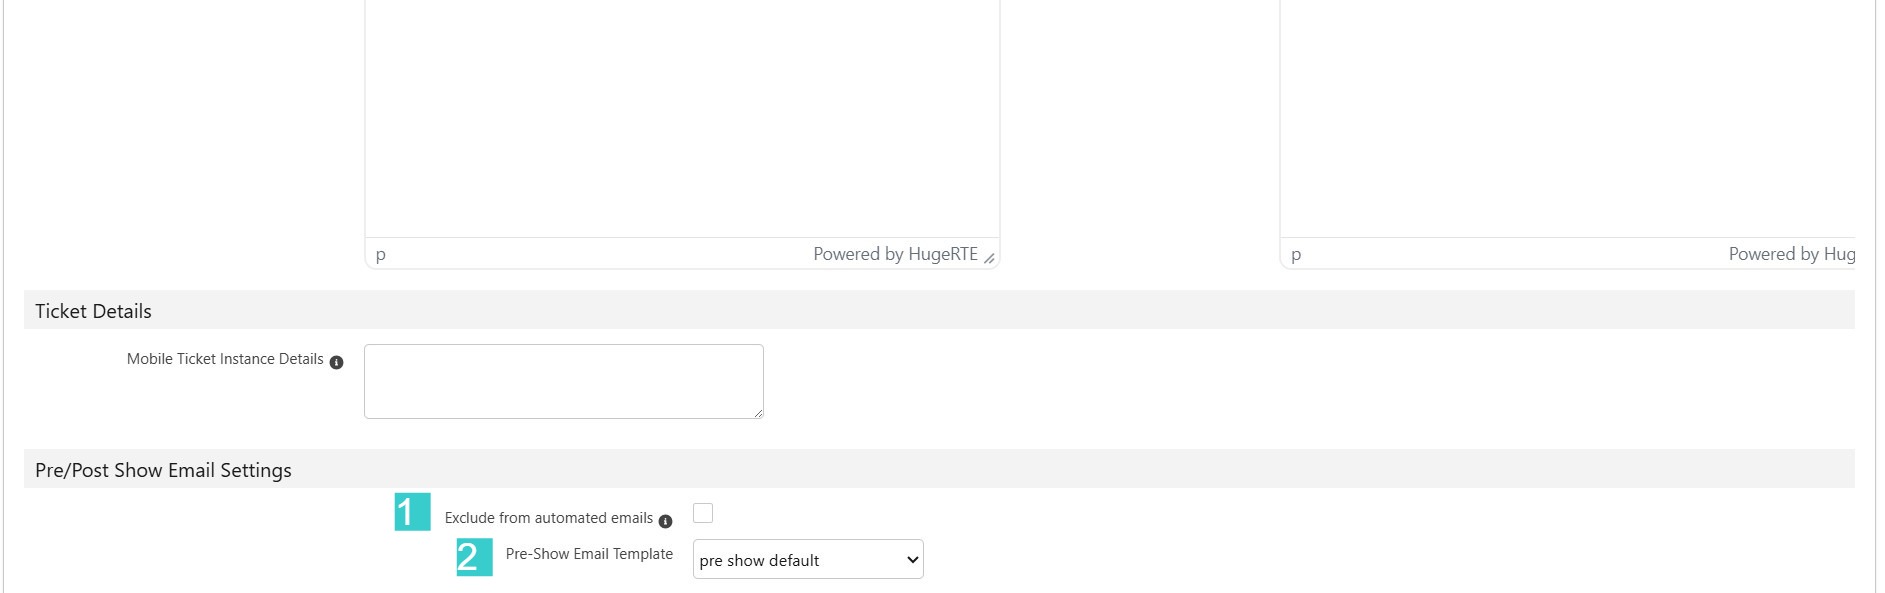
Here you can either:
Exclude from automated emails: Check this box if you don't want patrons for this Event Instance to receive Pre- and Post-Show Emails
Pre-Show Email Template: Select one of your Automated Communication templates for this Event Instance to send to patrons
Preview an email from your templates
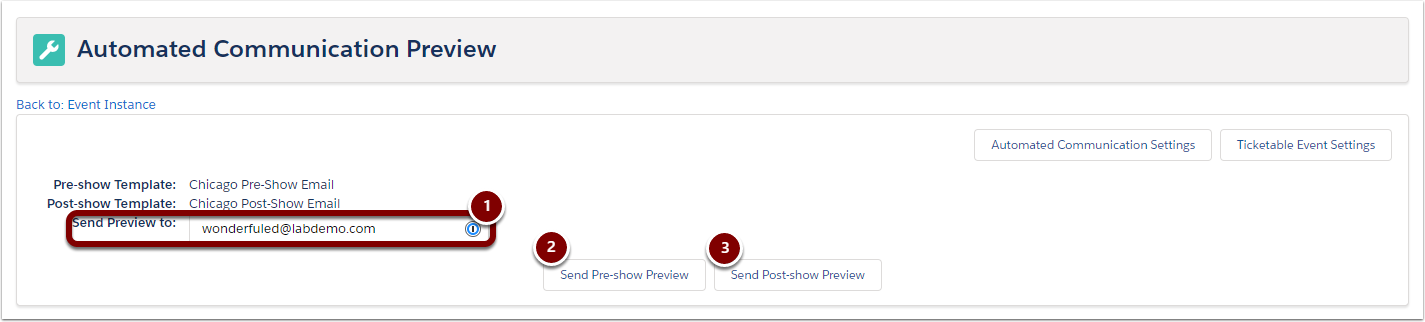
Before your clients see your beautiful new templates, it's best for you (or a co-worker!) to take a look at them first.
From an Event Instance, click the Automated Email Preview button, enter the email you want the preview to go to, then click Send.
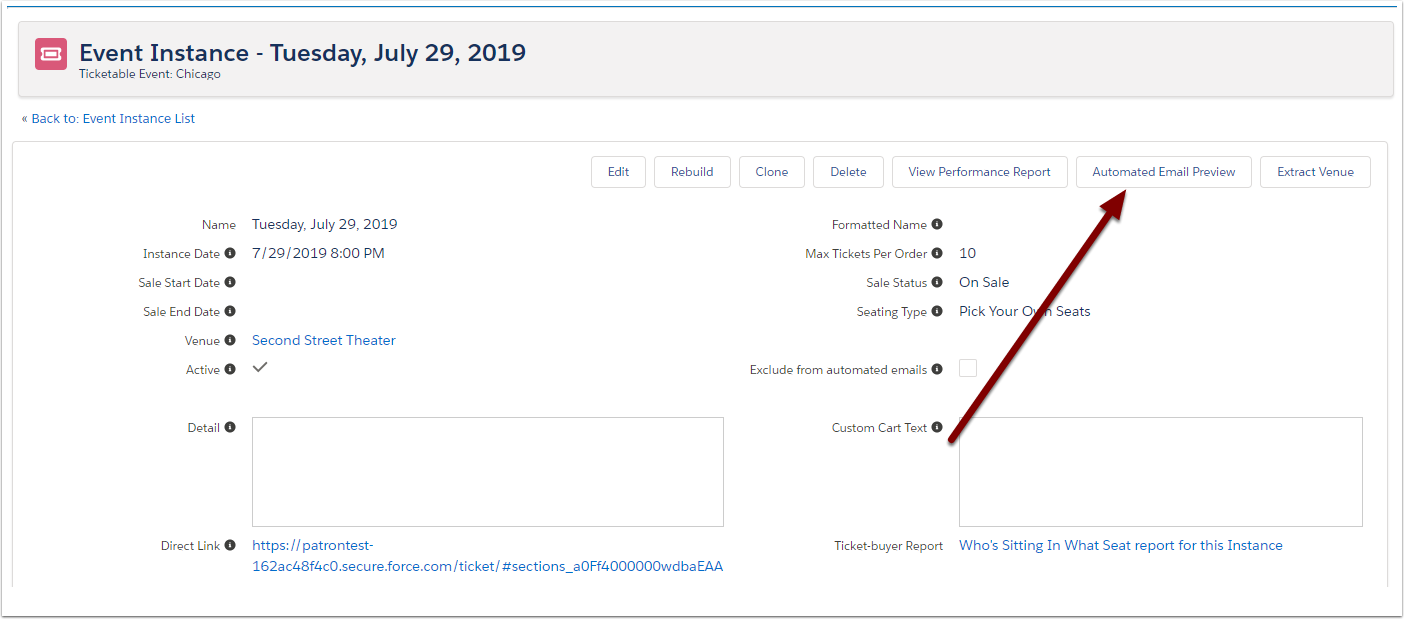
Bonus: you can send both the pre- and post- show email from the same place!
Exclude specific Ticketable Events and/or Event Instances from pre- and post-show emails
You may have a certain show (or run of shows) you don't want to send out Automated Communications for. You can stop your automatic emails from sending on the Ticketable Event or Event Instance level.
Stop the presses
Head to your Event Inventory from the PatronTicket Hub
Find the Ticketable Event you want to exclude from sending automatic pre- or post-show emails
Do you want to block pre- and post-show emails for every Event Instance on the Ticketable Event, or just for a couple different instances?
I want to block them for the whole Ticketable Event (every Instance)
Click Edit:
Check the "Exclude from automated emails" box and click Save:
Done!
I want to block them for specific Event Instances
Scroll down to find the Event Instance you want to exclude from automated emails and click it:
Click Edit:
Check the "Exclude from automated emails" box and click Save:
Done!
Repeat these steps as necessary
Add and assign new templates as necessary
Now that you've got your automatic emails set up, you'll want it to be part your process when adding new items to your Event Inventory. Each time you add new Ticketable Events or Event Instances, you'll want to go through this checklist:
- Create new Automated Communication email templates (if you're not using your default templates)
- Assign custom email templates to Ticketable Events (again, if you're not using defaults)
- Preview any new templates
- Exclude any Ticketable Events and/or Event Instances from automatic emails (if necessary)
Frequently Asked Questions
Will my template choices carry through when I clone a Ticketable Event or Event Instance?
You betcha. Create and apply your templates to your current season; when you create next season's Event Inventory, you can just update your existing templates with season-specific images/information.
How can I tell which unique templates are being used by which Ticketable Events?
Head to Automation Templates from the app launcher and click into the Automation Settings page - that list is at the bottom!
Do Automated Communications send to Contacts with "Opt Out", "Do Not Email", or "Do Not Contact" status?
They do - these emails are intended for non-marketing purposes, and are associated with the purchase of a ticket.
Do Automated Communications send only to Contacts that have been qualified?
No - Automated Communications emails will send to all ticket holders, regardless of whether you've qualified their Ticket Order or Contact yet.
Do all Ticket Orders for an event receive pre-and post-show emails?
Tickets Orders with the following statuses will receive Automated Communications:
- To Be Qualified
- Complete
- Partially Paid
- Reservation
This ensures that anyone with active tickets to your event receives the necessary information!
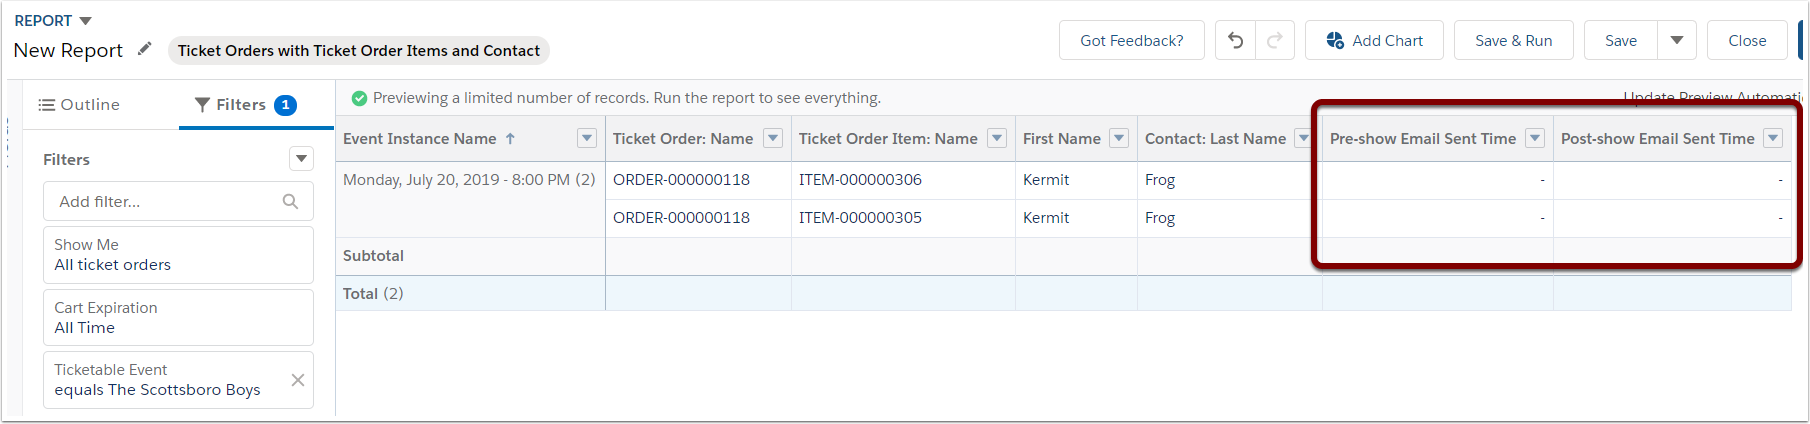
How can I tell who has received automatic pre- and post-show emails?
You can run a Ticket Orders with Ticket Order Items and Contact report to see when (or if) the pre-show or post-show emails were sent!
Can I only send pre-show emails and not post-show emails, or vice versa?
You can opt to only send pre-show emails, but not post-show emails by leaving the "Default Post-show Email Template" in Automated Communication Settings blank.
Inversely, you can opt to only send post-show emails, but not pre-show emails, by leaving the "Default Pre-show Email Template" in Automated Communication Settings blank.